
Business Central MCP Server, Part 2: A Read-Only Configuration for a Copilot Studio Agent
Note: This blog is a personal notebook. I write it to record what I work on, for my own reference, not to publish it on social media or to promote myself. If a post is still useful to you, I am glad, but that is not why it exists.
This post was published on April 24, 2026. Software versions, product features, links, and tool availability may have changed since then. Always check official documentation for the latest information. Some screenshots show small details. Zoom in on the page to see them clearly.
The first post in this series covered the default Business Central MCP Server setup: read-only, all API pages. This post builds one small named configuration and connects it to a simple Copilot Studio agent.
Problem
The default MCP configuration exposes every API page for read access. It is a master key that opens every door in the hotel: fine for a quick test, not for a real agent. A named configuration is a key card for one room.
It limits the agent to the pages you choose, and write access later requires one.
Why this matters
Copilot Studio has a tool limit per agent, and an unscoped tool list wastes it. A narrow configuration is also easier to review, to explain to a customer, and to extend.
Architecture
Three roles make up an MCP setup:
| Role | What it does |
|---|---|
| Host | The application the user talks to, for example Copilot Studio or Visual Studio Code. |
| Client | The part inside the host that manages the connection to a server. |
| Server | The system that exposes tools, in this case Business Central. |
The Business Central MCP Server sits on the standard API layer. Every call uses normal Business Central authentication and authorization.
An MCP Server Configuration is a named record that lists the API pages that act as tools and the operations each one allows. It must be active before an agent can use it. A separate switch, “Allow Create/Update/Delete Tools,” must also be on before any write works.
Copilot Studio currently allows up to 70 tools per agent, and each allowed operation counts as one tool. A small demo is easier to reason about with a static list of one or two.
Demo steps
The demo uses the standard PrintVis Cases API page in the CRONUS demo company, so no real data is at risk.
Part A: Business Central
-
Search for Model Context Protocol (MCP) Server Configurations and select New.
-
Set the general fields: Name =
DemoReadOnlyCases, Description =Read-only PrintVis Cases for a demo agent, Active = On, Dynamic Tool Mode = Off, Discover Additional Objects = Off, Allow Create/Update/Delete Tools = Off.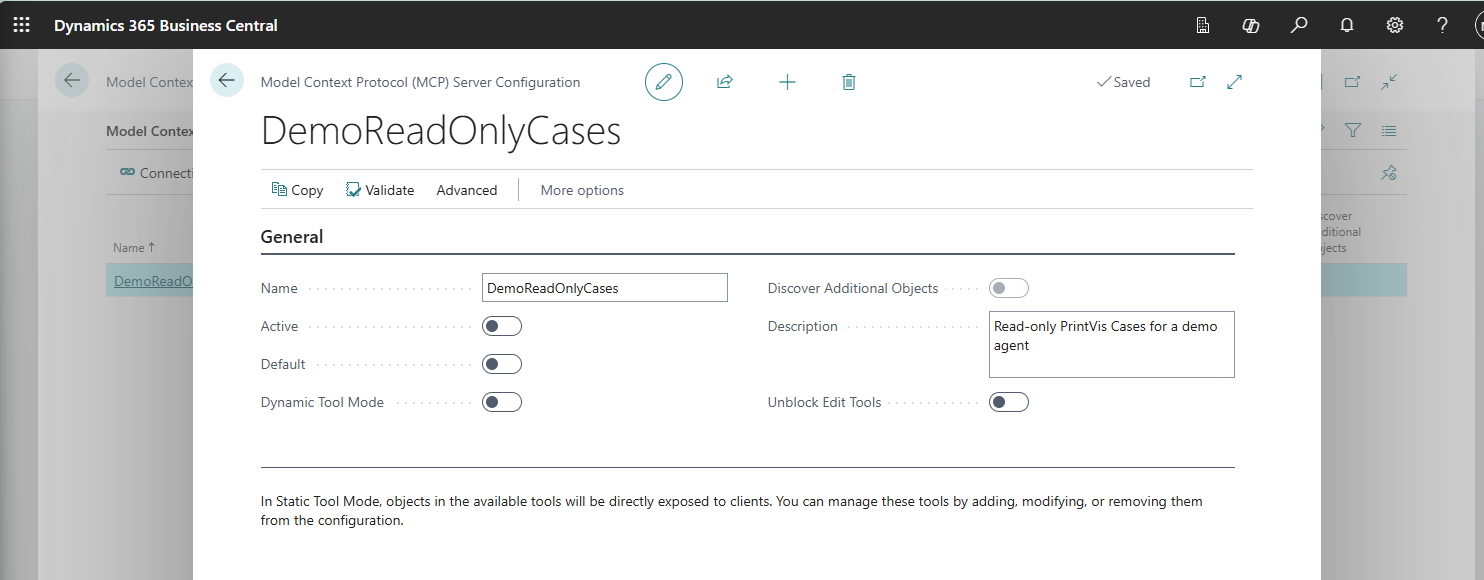
-
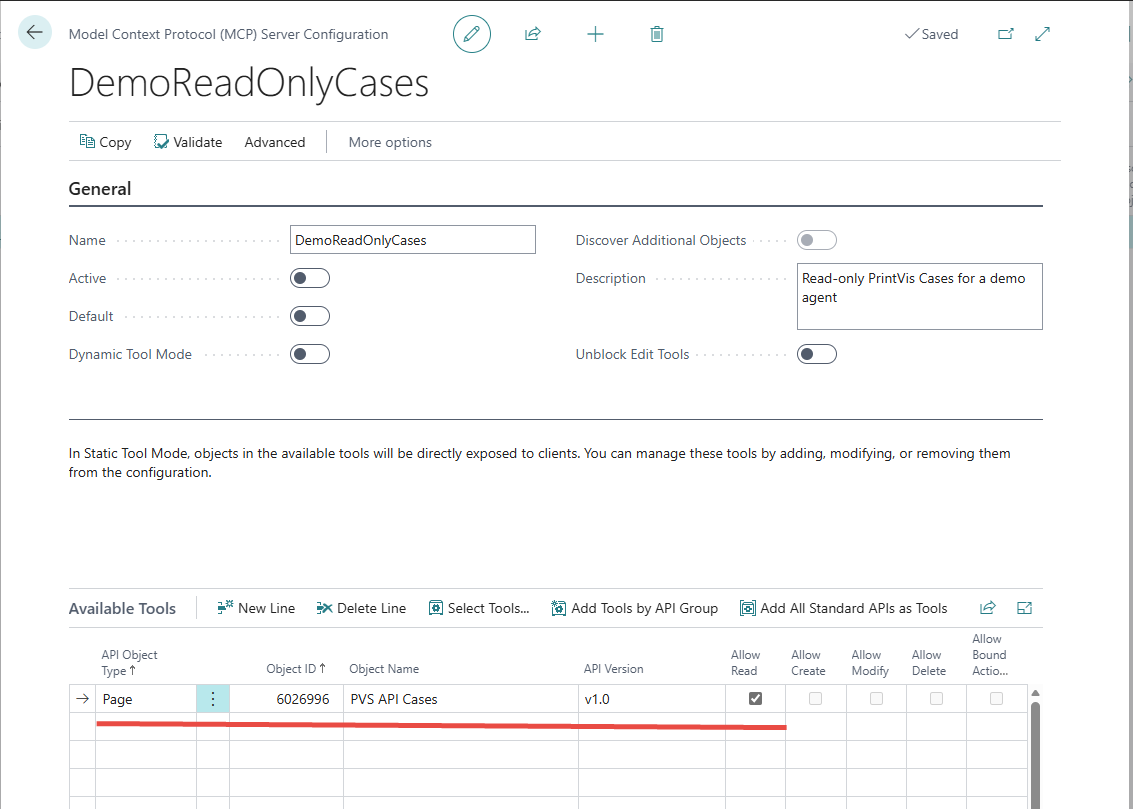
In Tools, add the standard PrintVis Cases API page (6026996 - PVS API Cases) or another Microsoft standard API object. Turn on Allow Read only.
-
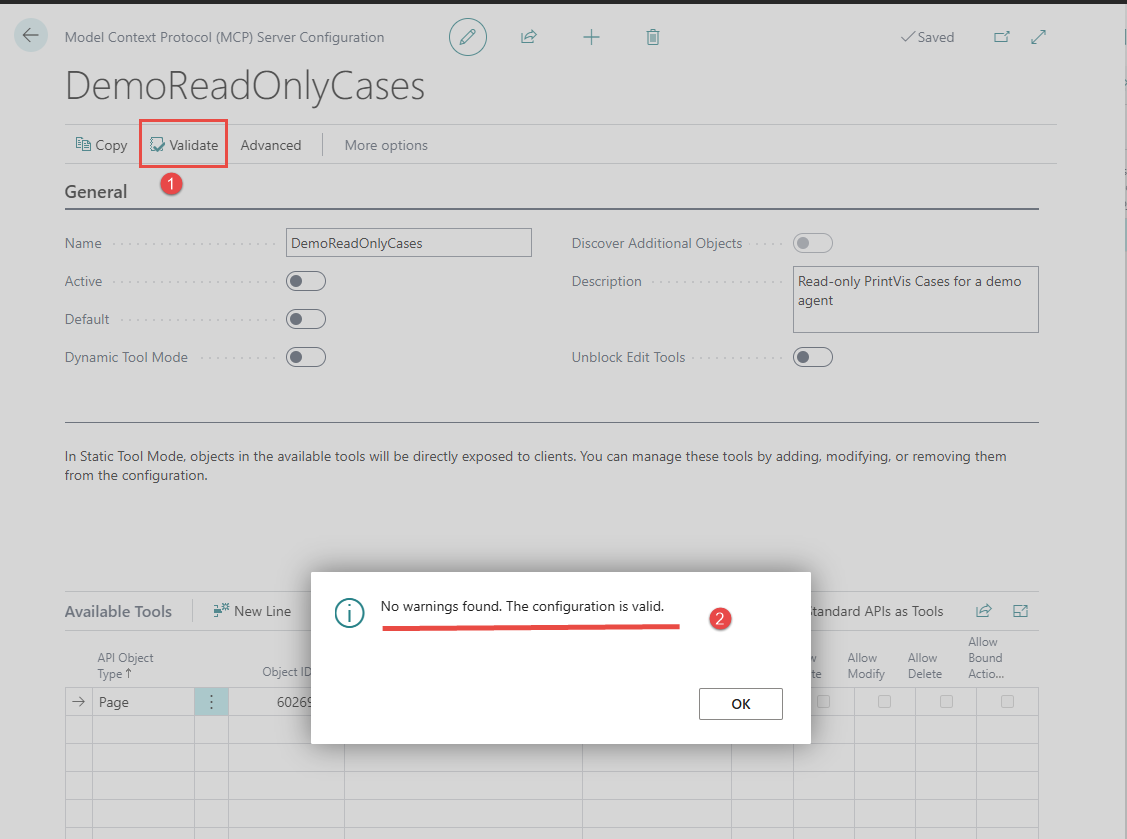
Select Validate and check that it reports no warnings.
-
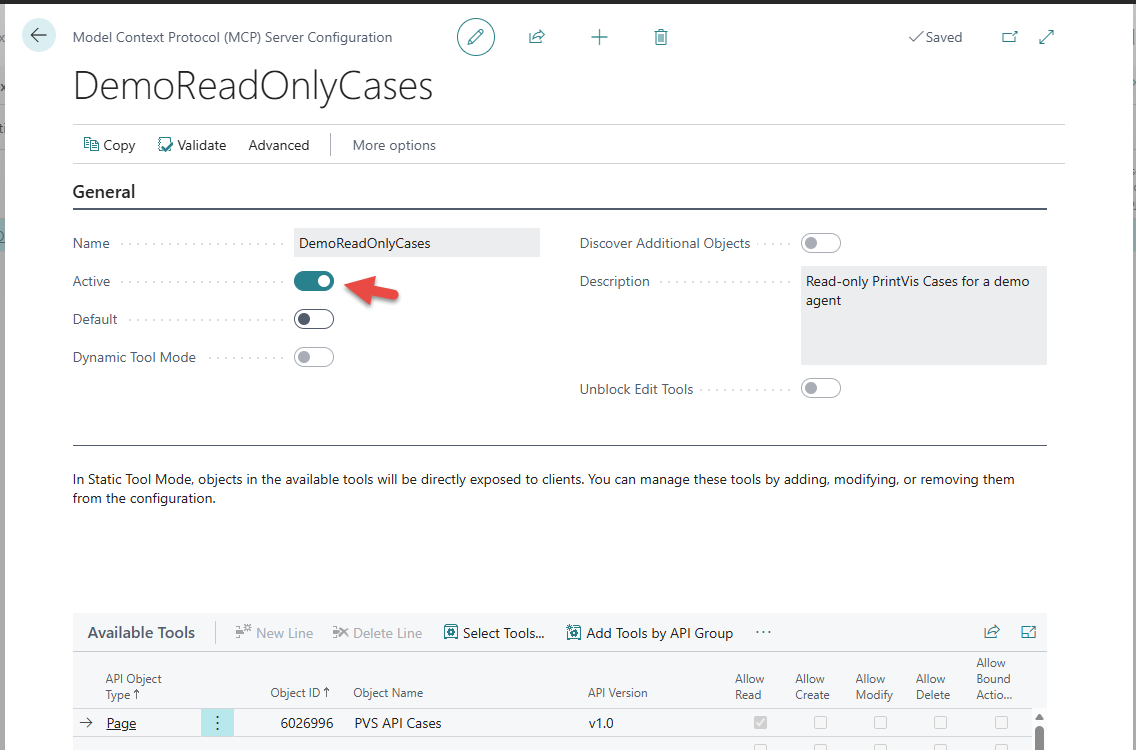
Select Active to confirm availability.
Part B: Copilot Studio
-
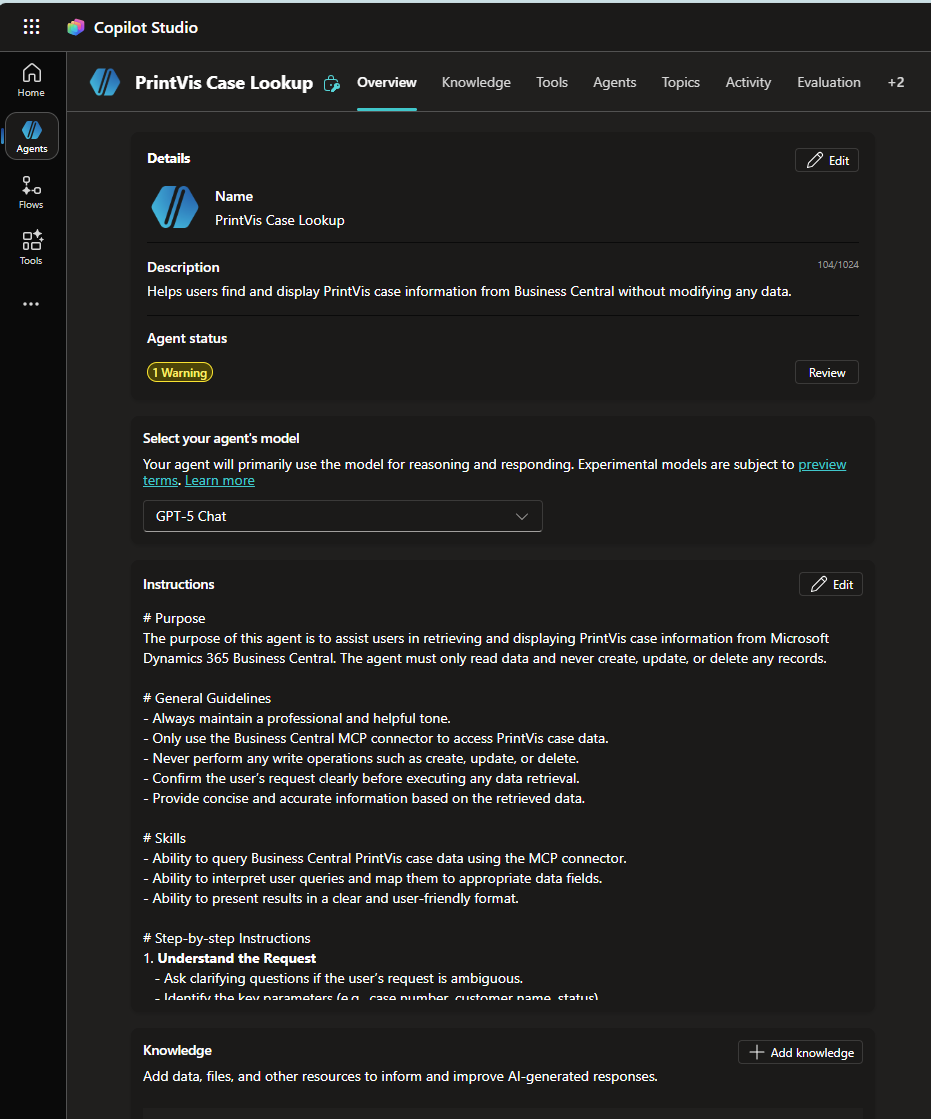
In Copilot Studio, describe the agent with a short prompt such as:
Create a simple agent that helps users look up Business Central PrintVis cases information. It must only read data through the Business Central MCP connector, and it must never try to create, change, or delete any record.
-
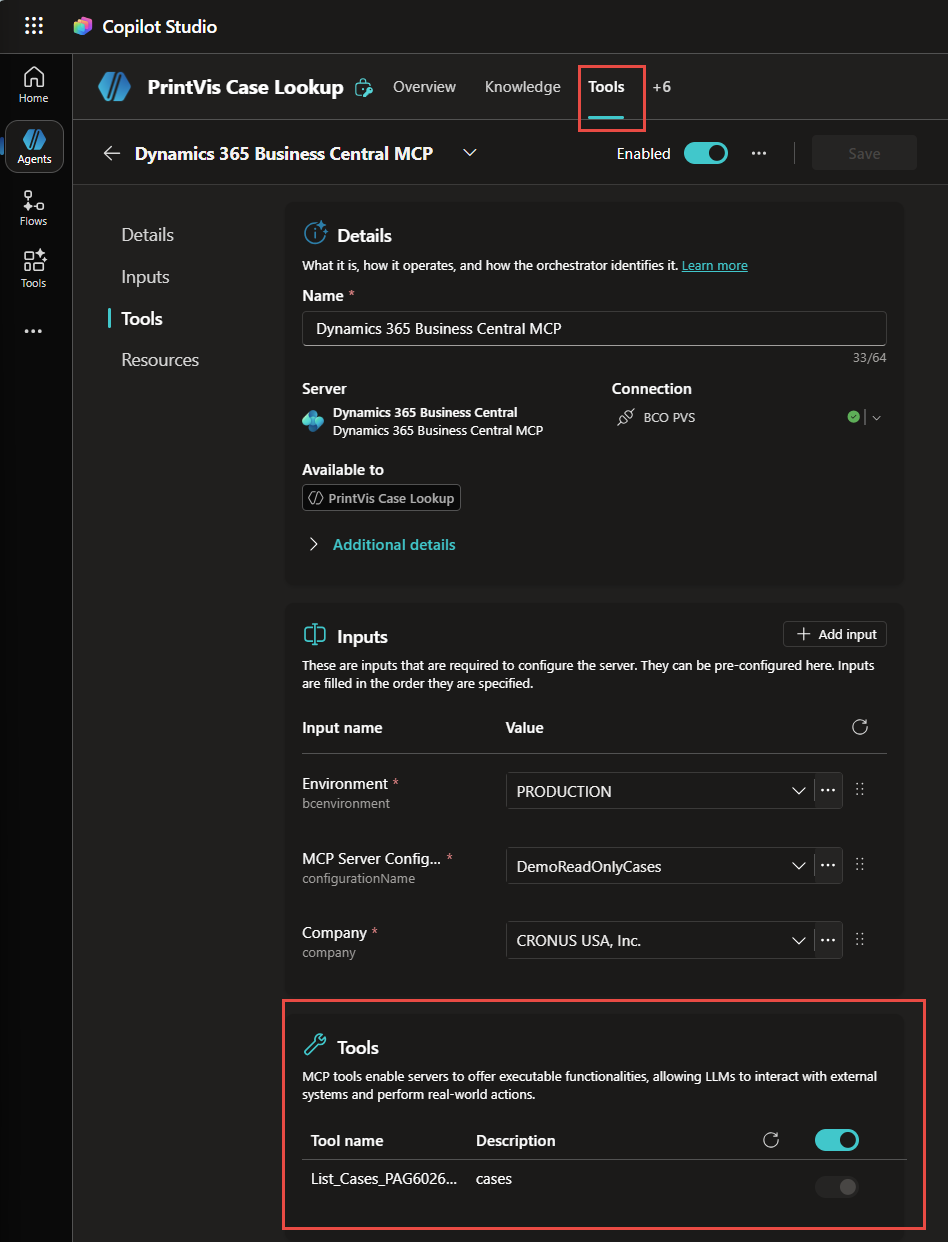
Open the Tools tab, select + Add a tool, and search for Dynamics 365 Business Central MCP Server (Preview).
-
If the connection shows Not connected, select Create new connection and sign in. Select Add and configure.
-
In Inputs, set Environment, set Company to the CRONUS demo company, and set MCP Server Configuration to
DemoReadOnlyCases. Select Save.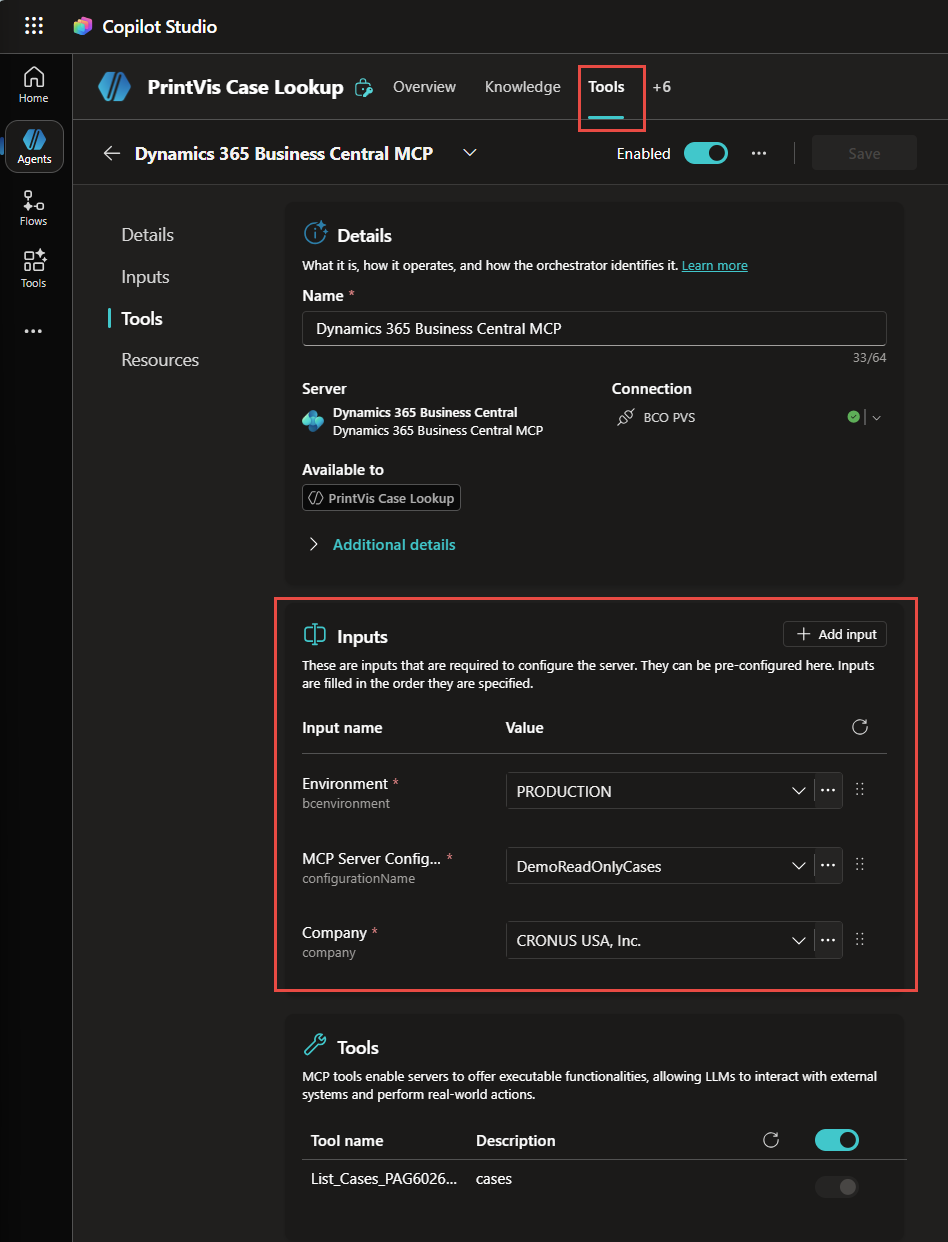
-
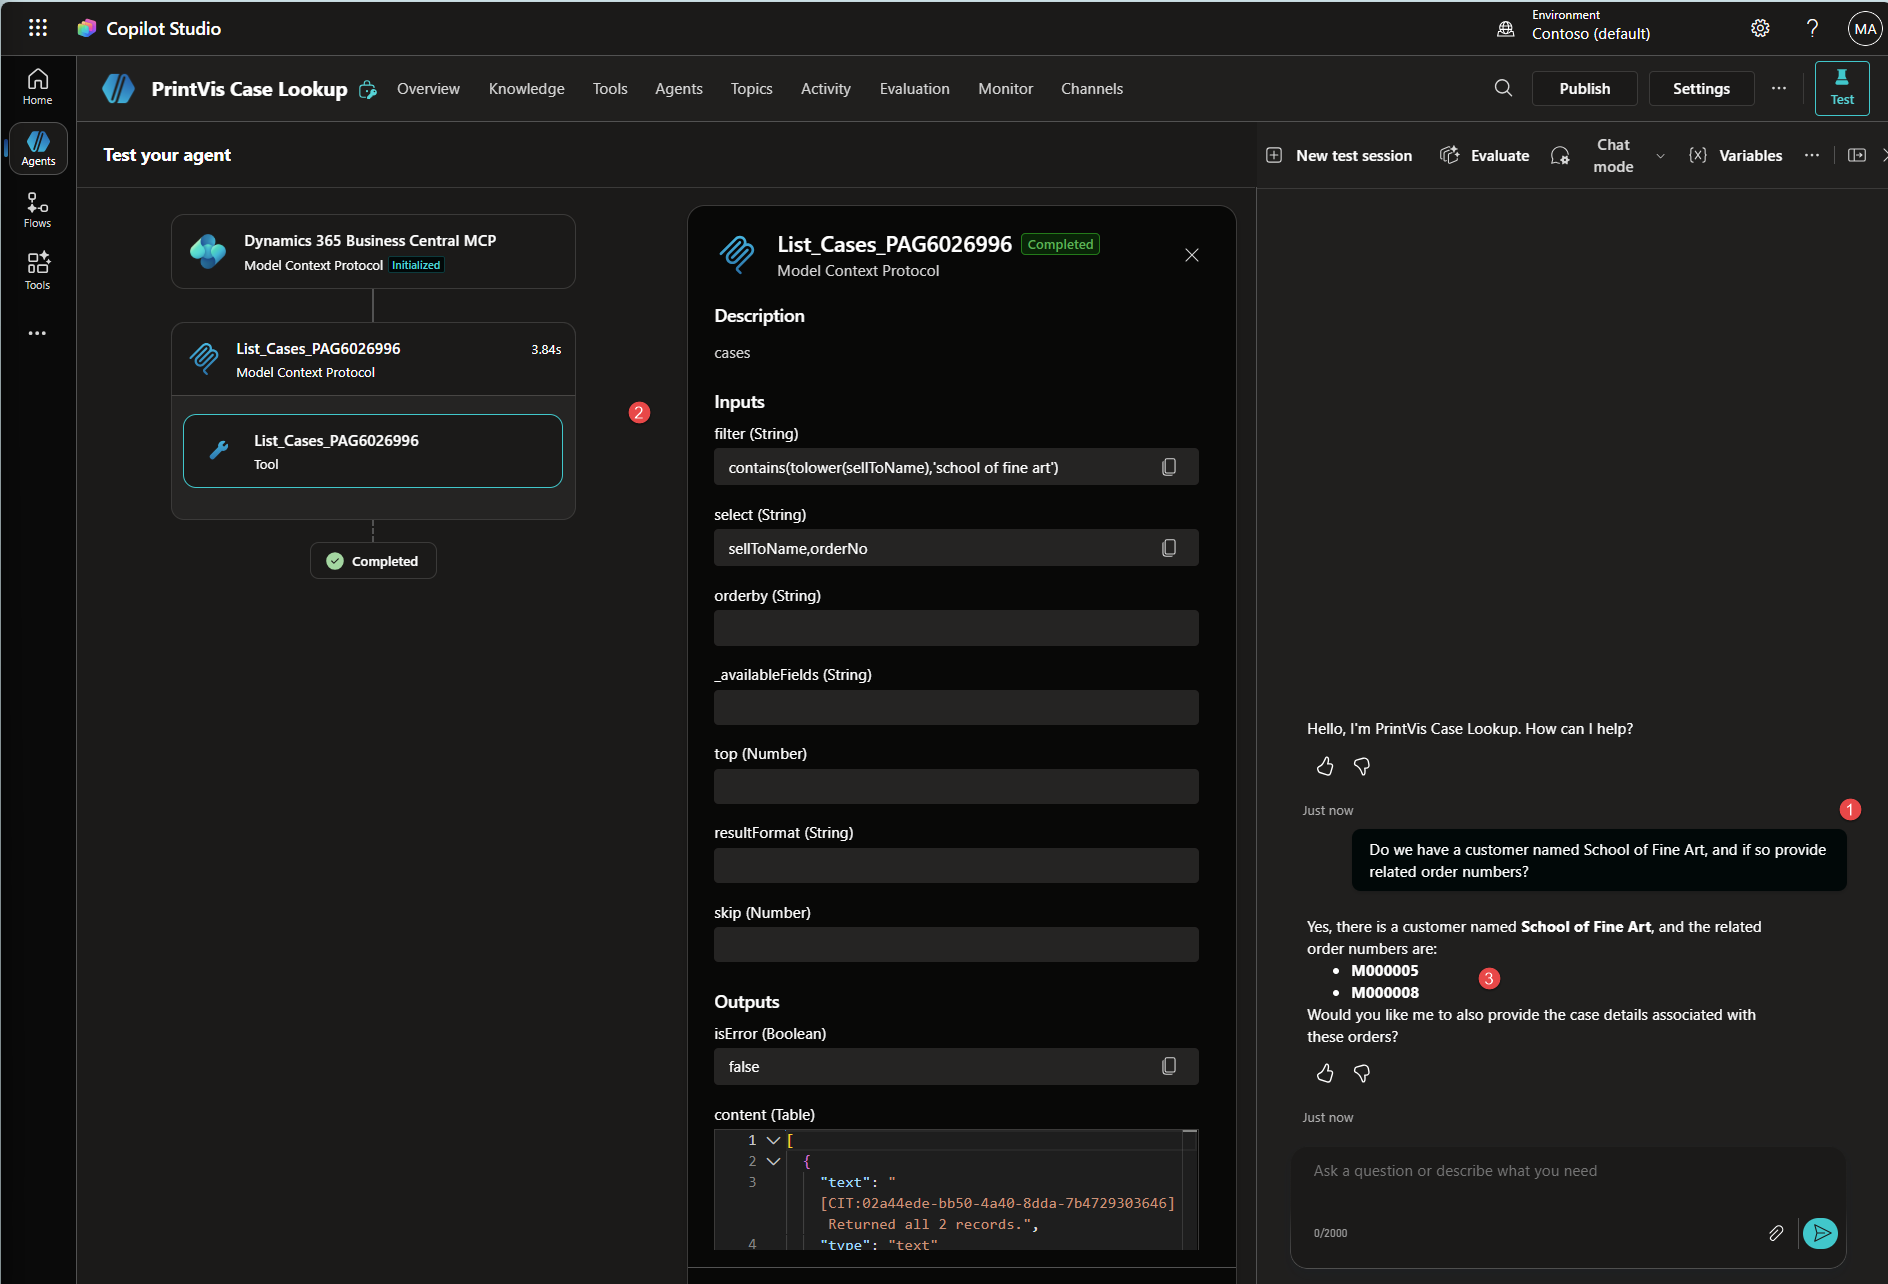
In the test pane, ask “Do we have a customer named School of Fine Art, and if so provide related order numbers?” Confirm that the agent answers from the case data and attempts no write action.
What is intentionally simple
- One API page (PrintVis Cases), read-only, static tool list.
- One agent, one environment, one company.
- No writes, bound actions, custom API pages, monitoring, or approval workflow.
Risks/limits
- The connector still shows “(Preview)” in Copilot Studio at the time of writing, so behavior can change.
- The default configuration still exposes every API page. A named configuration helps only if you use it.
- The tool limit (70 per agent at the time of writing) applies to the whole agent, not just this connector.
- Bound actions and writes carry more risk than reads. Treat them as a separate decision with their own review.
- Not covered: Microsoft Purview audit logging, configuration JSON export and import, and Copilot Studio credit cost. All matter before production.
Next iteration
- Add a second named configuration for one controlled write scenario, with user confirmation before any write.
- Turn on Dynamic Tool Mode when the tool list grows past a handful of pages.
- Export the configuration as JSON and store it with your solution documentation.
- Add short agent instructions on when to prefer read-only tools and when to ask before acting.
- Check the current Microsoft Learn guidance before production.
Closing note
A named configuration is small, but it is the difference between “the agent can see everything” and “the agent can see exactly what you decided.” Start with one API page, keep it read-only, and test before you add anything. The write scenario deserves its own review.