
Install, Update, and Remove a Custom Plugin in the GitHub Copilot App
Note: This blog is a personal notebook. I write it to record what I work on, for my own reference, not to publish it on social media or to promote myself. If a post is still useful to you, I am glad, but that is not why it exists.
This post was published on August 10, 2026. Software versions, product features, links, and tool availability may have changed since then. Always check official documentation for the latest information. Some screenshots show small details. Zoom in on the page to see them clearly.
This third post in the series shows the screens of the plugin lifecycle in the GitHub Copilot app. The earlier posts covered the GitHub Copilot app as an agent surface for AL work and how to build a custom marketplace and pack your AL tooling into a plugin.
The example plugin is mb-al-ai-toolkit, with one custom agent (al-fast) and seven AL skills for Business Central Per-Tenant Extensions.
Two facts control the whole procedure:
- A plugin from a custom marketplace needs a two-stage install: add the marketplace once, then install the plugin from it.
- Plugin management in the app is GUI-only. Do not type
/plugin installinto a session. That syntax belongs to the Copilot CLI.
Step 1 — Add the marketplace
In the Copilot app, go to Settings, select Plugins, then Install, then Add marketplace.
Enter your repository as an OWNER/REPO reference or a full Git URL. Select Add marketplace and confirm the dialog with Allow.
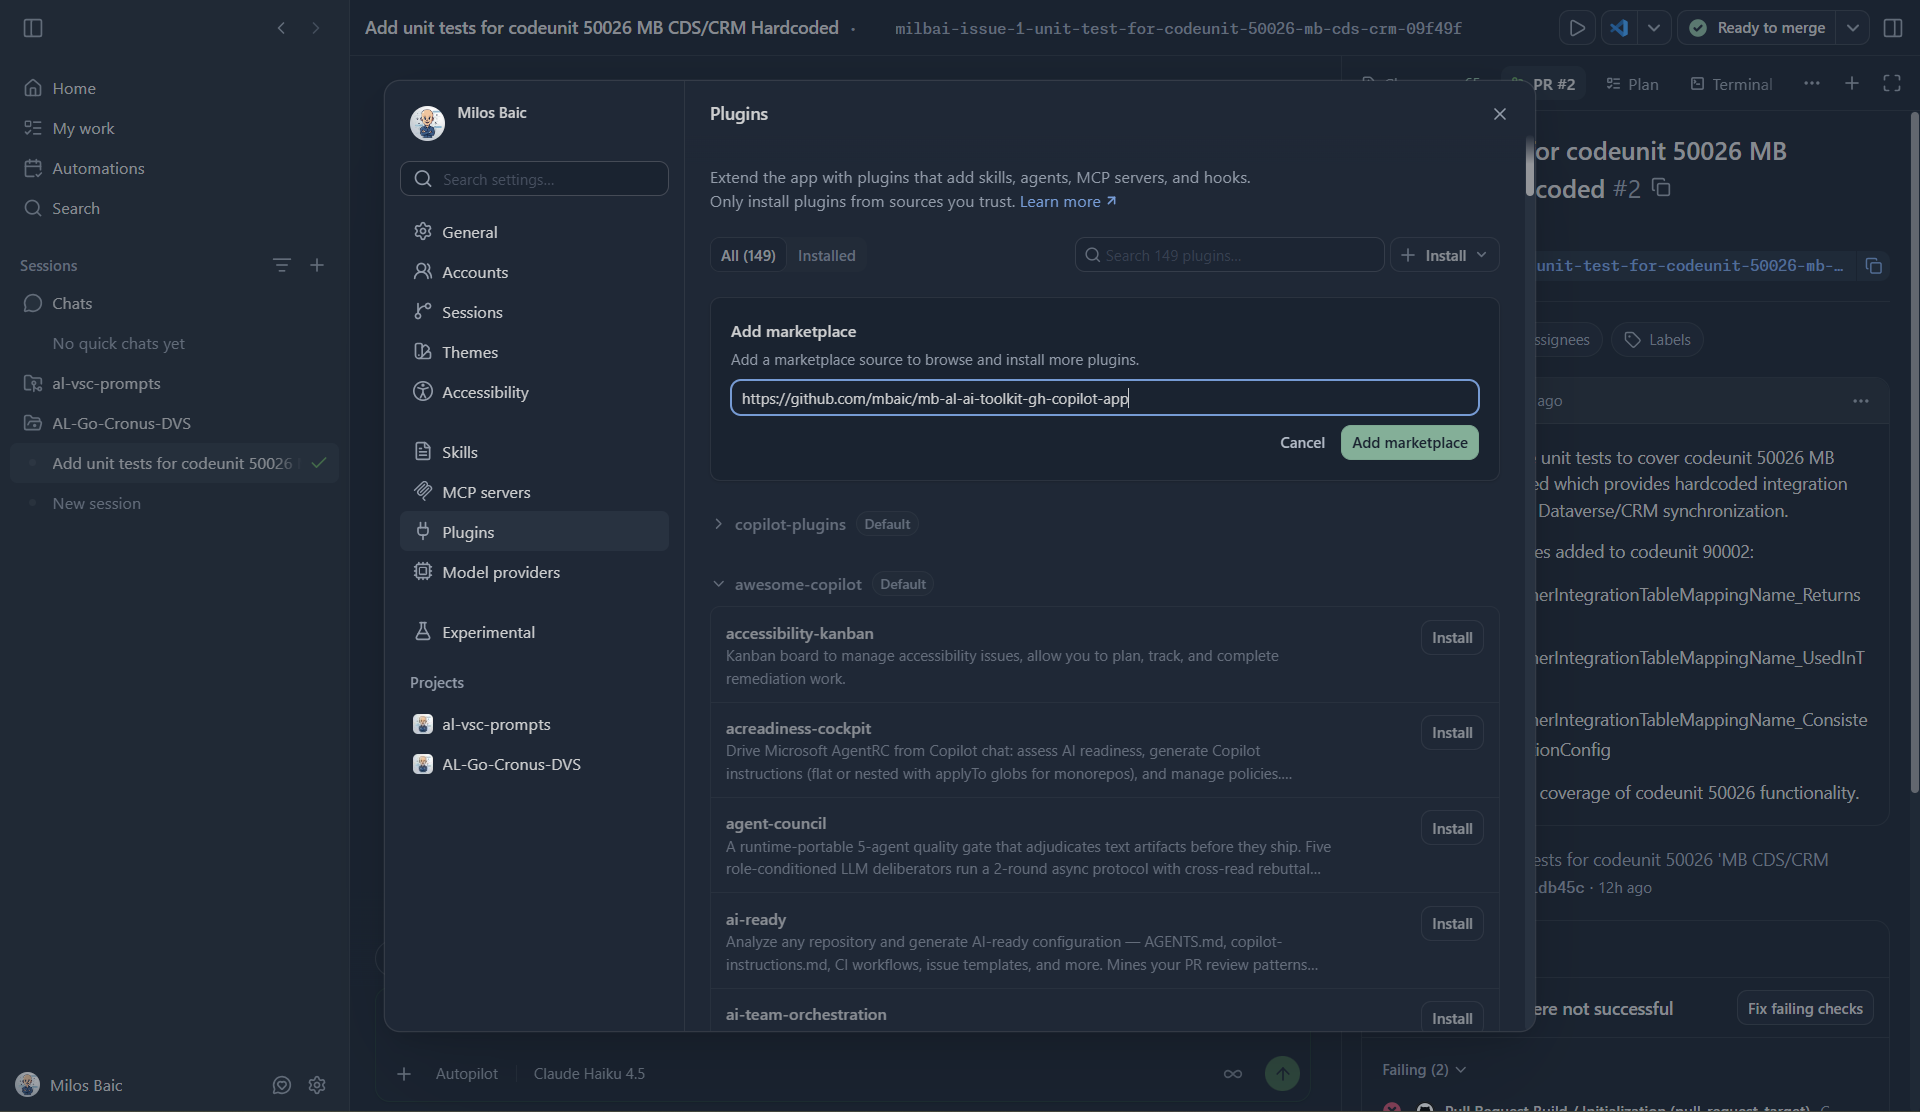
Step 2 — Install the plugin
Expand the new marketplace at the top of the list and select Install next to mb-al-ai-toolkit.
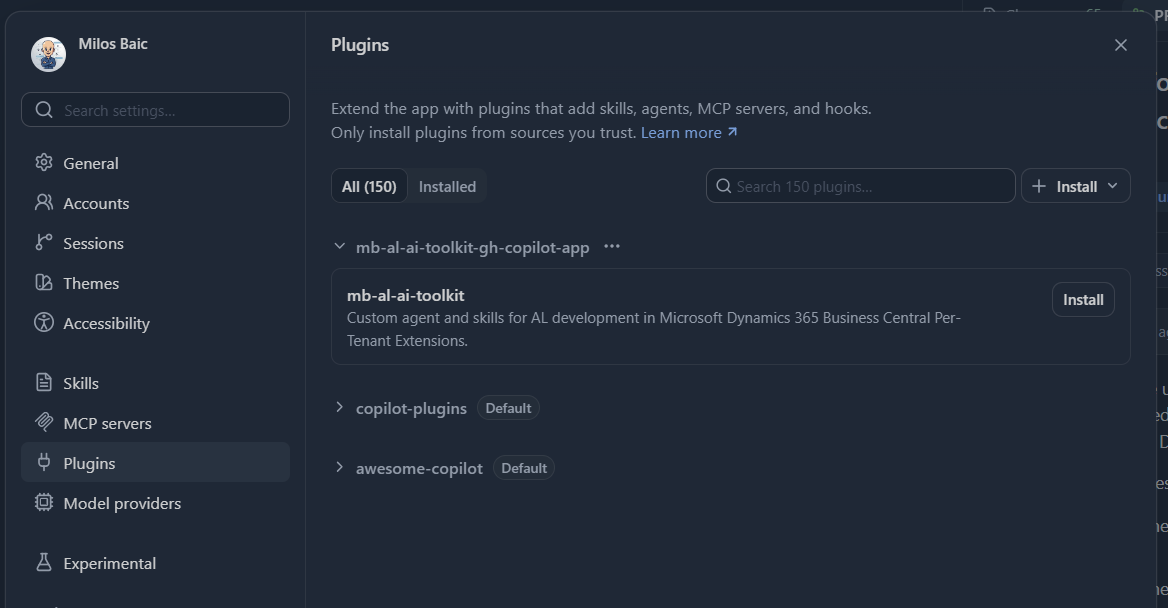
You add the repository, but the app lists the plugin under the marketplace name from marketplace.json. Keep the two strings identical. A repository rename changes the first string, not the second.
Step 3 — Confirm the install
The counter changes to Installed (1), and the plugin shows its version number and an enabled toggle.
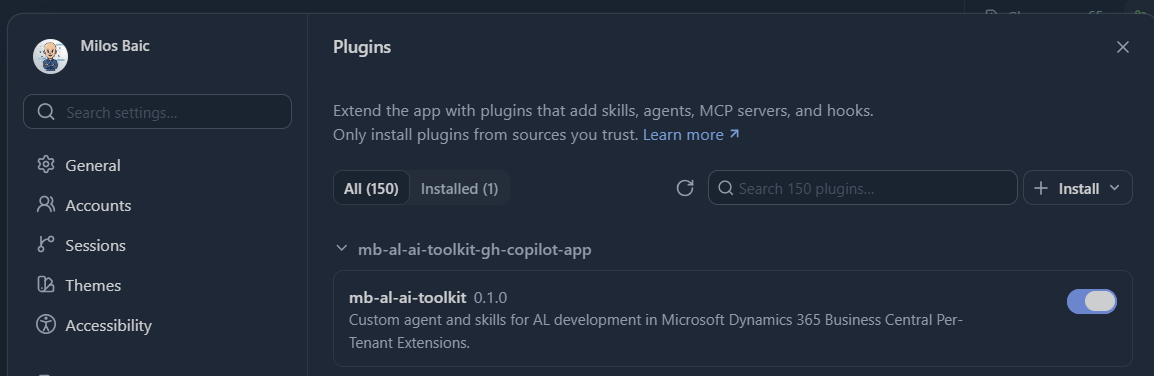
The toggle disables a plugin without an uninstall. This helps when you compare agent behaviour with the plugin on and off.
Step 4 — Find the custom agent
Start a session and type /agent in the chat box.
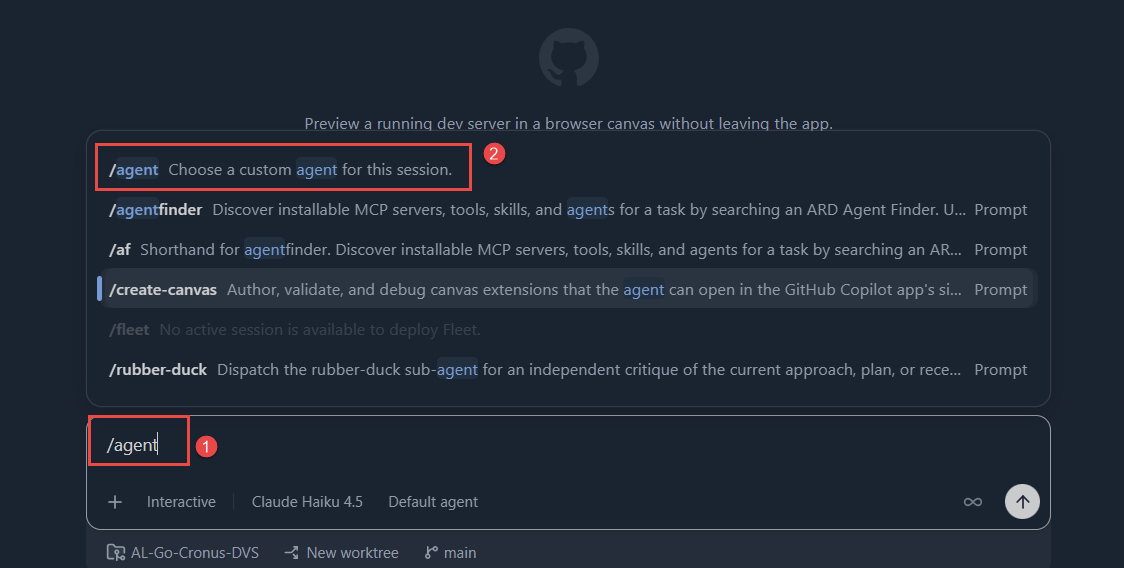
Select /agent. The agent picker shows Default and the plugin agent, mb-al-ai-toolkit:al-fast. The prefix is the plugin name, so you know where the agent comes from.
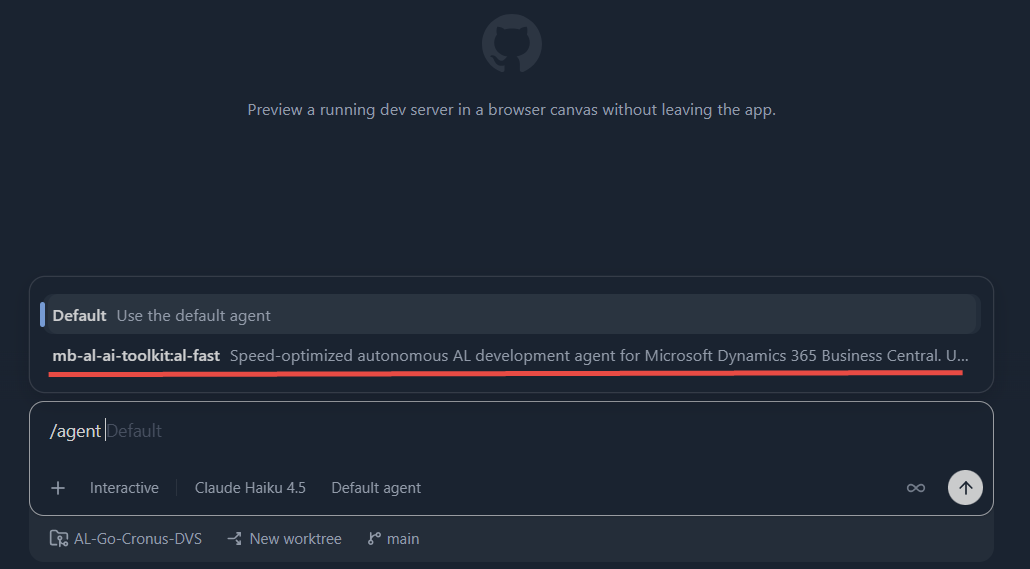
Step 5 — Select the agent from the chat bar
You do not have to type the command. The Default agent button on the chat bar opens the same list.
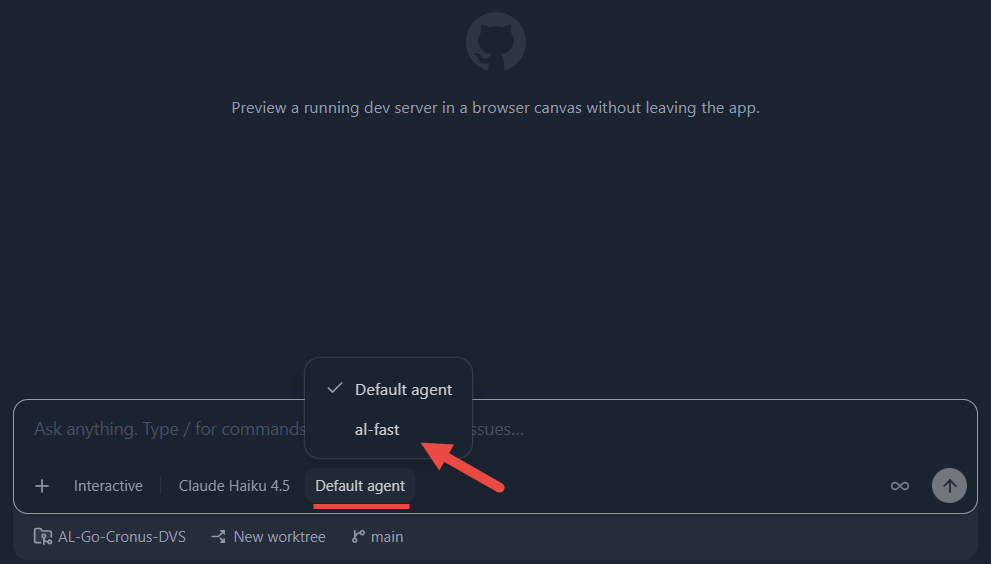
The chat bar also shows the active agent for the session, so use it when you switch agents often.
Step 6 — Confirm the skills
Type /skill in the chat box. The list shows the al-* entries from the plugin, such as al-best-practices, al-review-code, and al-refactor-code.
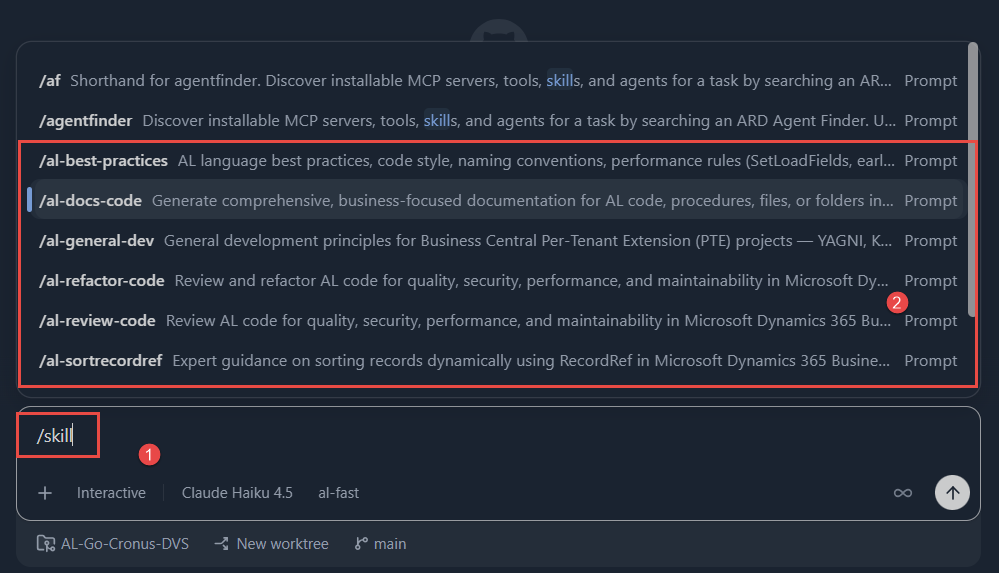
This list proves that the install worked. Copilot also selects a skill on its own: it matches the description field of each skill against a natural request such as “review the AL code in this codeunit”.
Step 7 — Update or uninstall the plugin
An installed plugin is a photocopy, not a live link. Copilot copies the plugin content at install time and does not poll your repository.
The … menu next to the plugin has two actions:
- Update plugin — the app replaces the cache with the current content from the marketplace.
- Uninstall — the app removes the plugin. The marketplace stays in the list.
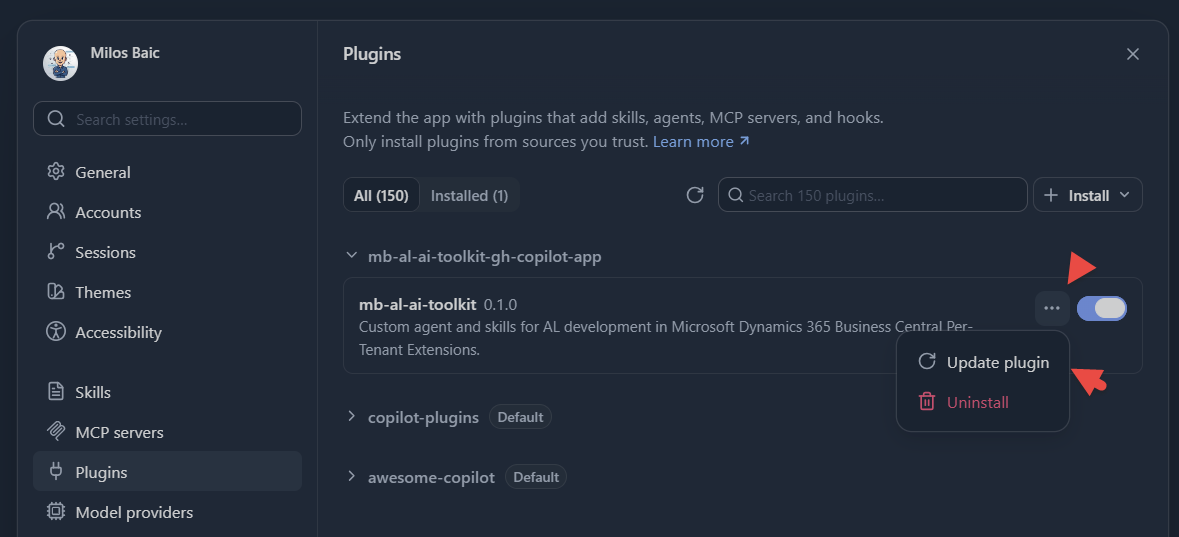
Run Update plugin after every push to the plugin folder, and bump the version field in plugin.json and in the marketplace.json entry. The version number on this screen then shows which build each developer runs.
Step 8 — Refresh or remove the marketplace
The marketplace row has its own … menu:
- Refresh catalog — the app reads the marketplace manifest again. Use it after you add a plugin or change a version number.
- Remove marketplace — the app removes the source and every plugin from it.
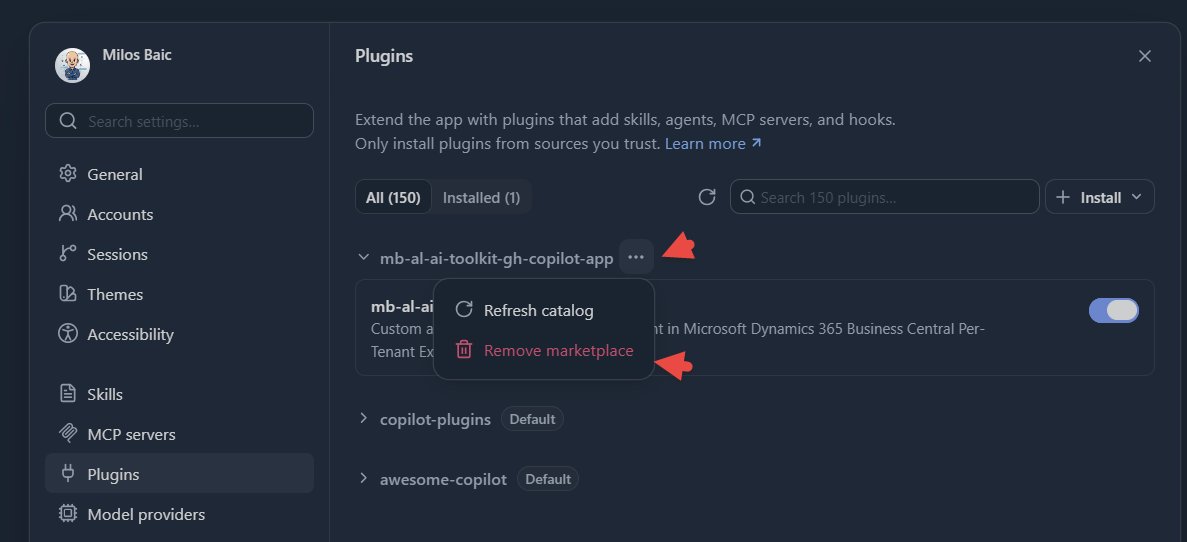
Uninstall the plugins first, then remove the marketplace, to keep the state clean.
What to remember
The cache is the most common surprise. Your change is live in GitHub, but the developer runs the old copy until the plugin is updated.
Your marketplace does not refresh itself. Only the two built-in marketplaces refresh at the start of a session.
Names can collide. Agents and skills load with first-found-wins, so a project-level or personal agent with the same name silently wins over the plugin. Use a prefix such as al-.
Enterprise policy can block the install. With strictKnownMarketplaces in managed-settings.json, Copilot allows only the listed marketplaces. Get your repository on the list before a team rollout.
The plugin does not validate AL. The AL compiler, the code analyzers, the AL-Go test runs, and the pull request review all stay.
Closing note
The plugin lifecycle in the Copilot app is four screens: add the marketplace, install the plugin, update it, and remove it. Point the same steps at your own marketplace repository, and your AL team gets one install path and one place to check the version.