
VS Code Agents Window: Manage Agent Sessions in One Place
Note: This blog is a personal notebook. I write it to record what I work on, for my own reference, not to publish it on social media or to promote myself. If a post is still useful to you, I am glad, but that is not why it exists.
This post was published on September 13, 2026. Software versions, product features, links, and tool availability may have changed since then. Always check official documentation for the latest information. Some screenshots show small details. Zoom in on the page to see them clearly.
The Agents window is a separate Visual Studio Code window for agent work. You give tasks to agents there, watch them run, and review the results. You still write code in the normal editor window.
Think of a parcel tracking page. One page shows every parcel: in transit, waiting for a signature, or delivered. The Agents window does the same for agent sessions.
This post shows it with two AL projects, an app and its test app. It also shows where canvases fit in.
Problem
A Business Central extension often has more than one AL project, for example an app and its test app in separate repositories.
Suppose you give one agent task to each project. In the Chat view, each task stays in its own editor window. You switch windows to see which agent waits for an approval and what each agent changed.
Why this matters
A fast agent makes the reviewer the slow part. With agent work spread across windows, a reviewer can miss a changed file or a waiting agent. That change can then reach a pull request, a sandbox, or a release without review.
The Agents window lists all sessions in one sidebar: running, waiting for you, or finished. You review the changes of each session before you commit them.
Architecture
The Agents window uses a few terms.
| Term | Meaning |
|---|---|
| Session | The unit of work with an agent. It holds the workspace, the code changes, and one or more chats for one task. |
| Chat | One conversation inside a session. Chats in the same session share the workspace and can edit the same files. |
| Harness | The agent runtime that runs a session, for example Copilot, Claude, or Codex. |
| Agent Host | A background process that runs harnesses and owns their sessions. The Chat view and the Agents window both connect to it. |
| Worktree | A second working folder for the same Git repository, on its own branch. The agent changes files there, not in your open folder. |
The Agent Host owns the session, and each window only shows it. You can start a Copilot or Claude session in the Chat view and continue it in the Agents window, with no new session and no forked chat. Sessions on the older Local harness run only in the Chat view. Sessions and chats
An active turn can continue after you close the project window, if VS Code itself stays open. Agent Host architecture
Each session runs in one workspace: the first folder or repository that you select. Other folders, issues, or pull requests can be attached as context. Multi-root sessions are not supported yet, so an AL team with a multi-root .code-workspace file starts one session for each project.
This is the flow of one session:
Business Central is outside this flow. The agent edits AL files and runs commands in your workspace. It does not write to a Business Central environment unless you add a tool for it, for example an MCP server. This example adds none.
Canvases
A canvas is an interactive view next to the chat, for example a review board or a form. You and the agent work on the same item in it. Canvases are a preview feature, new in VS Code 1.142 (14 October 2026). VS Code 1.142 release notes
- Setup: Turn on the
chat.canvases.enabledsetting, then start a new local session with the Copilot harness. - Create a canvas: Type
/create-canvasin the chat, and a skill builds a canvas extension in your workspace. A chat plugin can also contain one. - Open it in the Agents window: Select Add Tab (+) > Canvas.
The setting is off by default. Add this line to your VS Code settings.json:
"chat.canvases.enabled": true
Both canvases from my repository mbaic/mb-copilot-release-sharer work in the Agents window. Release Sharer turns a GitHub release into a customer email. Activity Sharer turns your GitHub activity into a standup note.
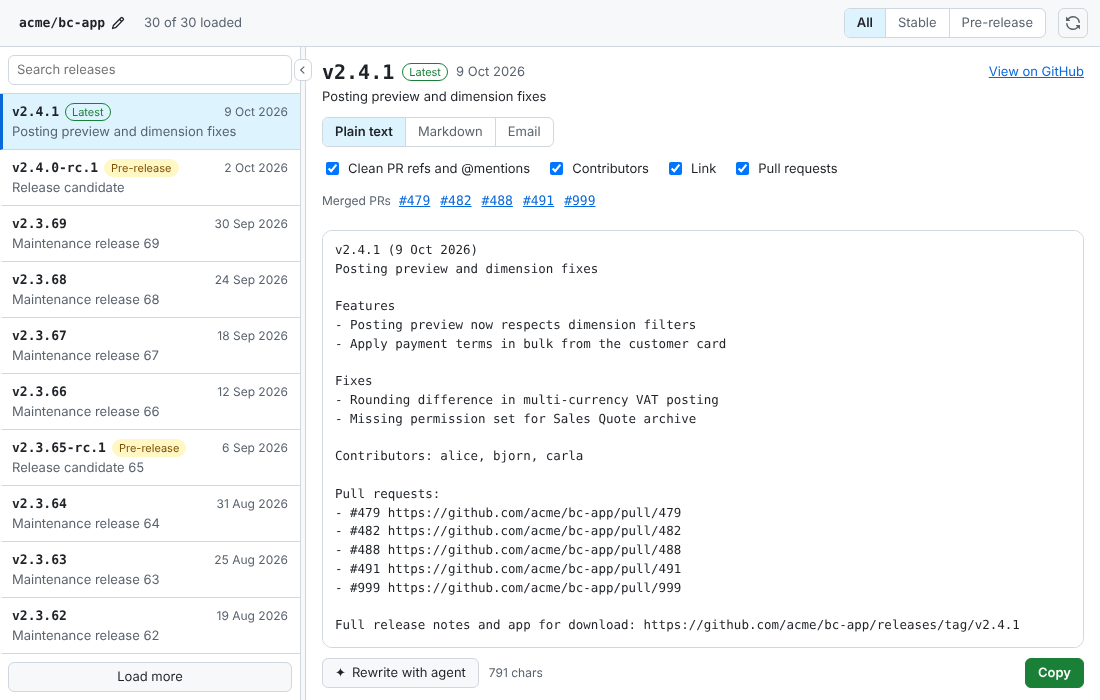
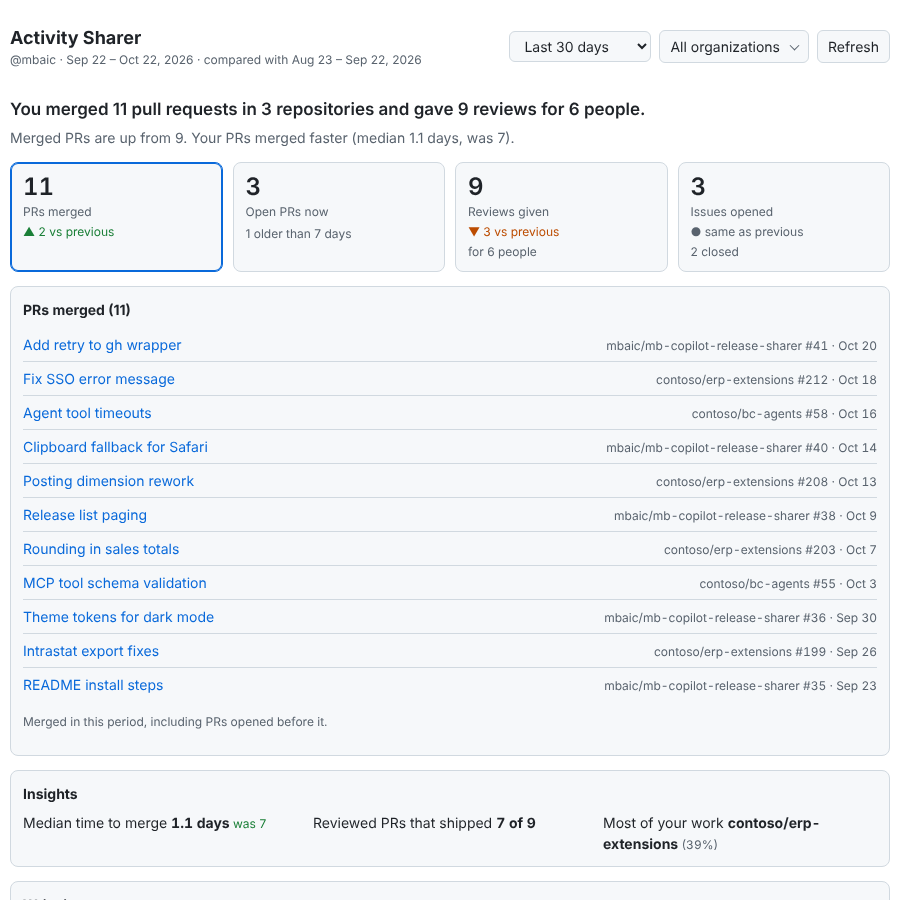
Sample data, the same screenshots as in the canvases post.
For the design of both canvases and an AL example, see GitHub Copilot Canvases: A Shared Screen for You and the Agent.
When to use which view
| Situation | Use |
|---|---|
| Write and change code in one workspace | Chat view |
| Give tasks to agents in several projects | Agents window |
| Monitor and review several sessions | Agents window |
| Continue a Copilot or Claude session from the other window | Either view, because the Agent Host owns the session |
Demo steps
Prerequisites:
- A current version of VS Code. This post uses VS Code 1.142 as the reference.
- GitHub Copilot, signed in.
- The AL Language extension.
- Two AL projects in Git repositories, with all work committed.
Steps:
- Open the Agents window with Open in Agents in the title bar, or with Chat: Open Agents window in the Command Palette.
- Select New, the app folder as the workspace, and New Worktree in the isolation picker.
- Enter a prompt for the app, for example: “Add a check to the posting codeunit that blocks posting when the inspection date is empty.”
- Select New again, then the test app folder and New Worktree.
- Enter a prompt for the test app, for example: “Add a test codeunit for the posting check. Use the Given-When-Then structure.”
- Monitor both sessions in the sidebar, and answer an agent that waits for you.
- Open Changes for each session. Read the diff and comment on lines that need a fix.
- Compile both projects and run the tests yourself.
- Commit the changes, or select Create PR.
A new worktree contains only committed files. The .alpackages folder is usually Git-ignored, so the worktree has no symbols. Download them in the worktree, or copy them with the git.worktreeIncludeFiles setting. Use the Agents window
What is intentionally simple
- Two local sessions only. One per project, with no cloud agents or remote machines.
- No pipeline. No CI and no AL-Go for GitHub workflow.
- No custom setup. No custom agents, repository instructions, or Business Central connection.
Risks and limits
- Some features are in preview or experimental. The Agents window reached the stable release as a preview in VS Code 1.120. The documentation labels canvases and automations as preview too. Behavior can change between releases.
- A worktree session does not ask for approval. It uses the Allow all permission level, and a worktree does not limit commands, network access, or files outside it. For a customer repository, I would use agent sandboxing or a dedicated development machine.
- Agent output is not tested code. Review the diff, compile, and run the tests before you merge.
- The agent does not know your Business Central rules. Object ranges, prefixes, and posting rules must come from your instructions.
- More parallel sessions mean more review work. Start only as many as you can review the same day.
Next iteration
- Add repository instructions for AL naming, the object prefix, and object ranges.
- Copy the symbols into new worktrees with
git.worktreeIncludeFiles. - Connect each session to a pull request that runs an AL-Go for GitHub build.
- Test a read-only Business Central MCP server inside a session.
Closing note
The Agents window gives you one place to start, monitor, and review agent work across AL projects. The review work stays the same. Give each task its own worktree, and keep a human review before every merge.